The L-Shaped Island Rules Most People Get Wrong
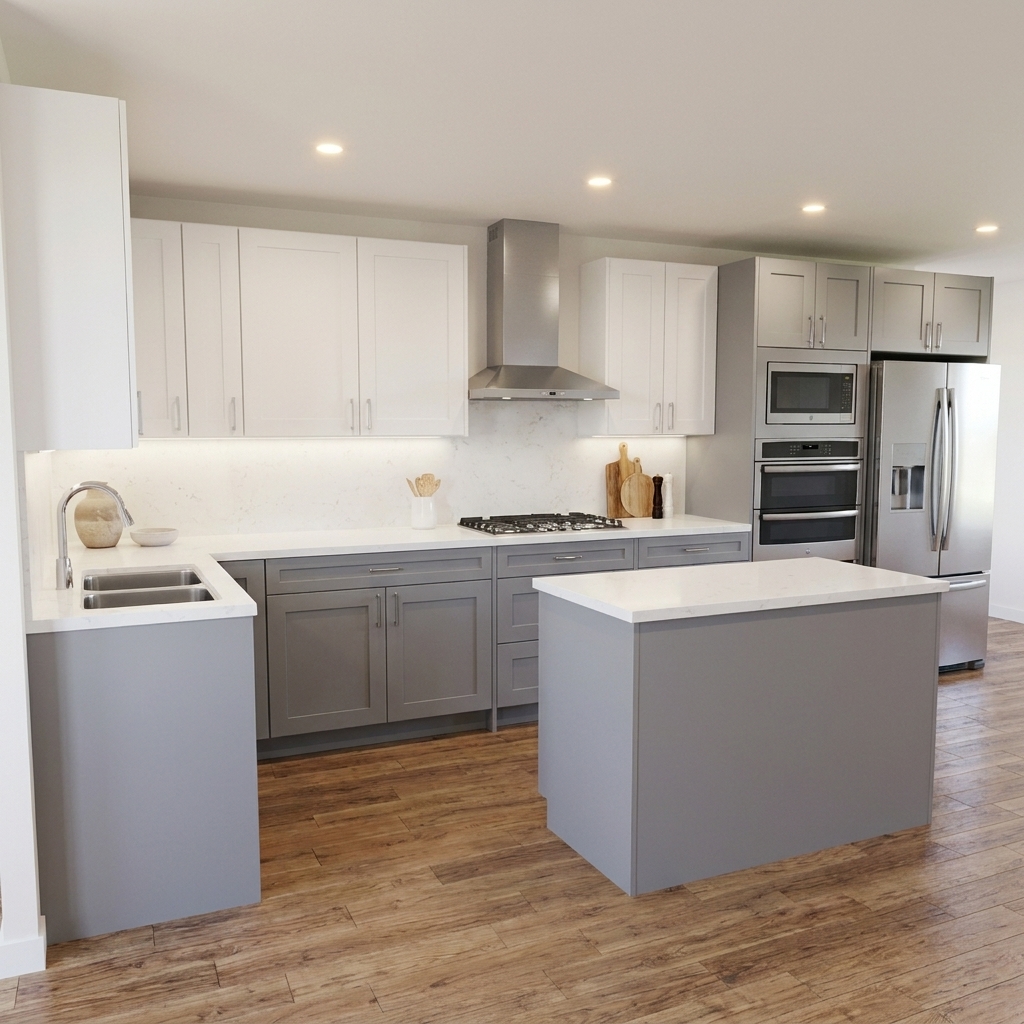
Apartment Therapy reports that 42 inches of aisle clearance — the National Kitchen & Bath Association's published minimum for a one-cook kitchen — is all that separates a functional island from one that turns an L-shaped kitchen into an obstacle course. This kitchen shows what the math looks like when it works: white shaker uppers float above slate-grey lowers, a square prep island sits centred in the L without crowding either cabinet run, and the chimney hood claims its wall cleanly. But that outcome is arithmetic, not luck — the wrong island depth, or the wrong distance to the oven tower, and the most popular kitchen layout in North America starts to feel like a galley with a post in the middle.
What 42 Inches Actually Means
The NKBA's 42-inch work-aisle standard is measured from the front edge of the island counter to the front edge of the opposing counter, cabinet door, or appliance — not to the wall behind those things. That distinction matters because standard base cabinets are 24 inches deep and perimeter countertops overhang them by about an inch. A room that measures 10 feet 6 inches wall to wall leaves roughly 78 inches of open floor, which sounds like plenty until you subtract 25 inches for each perimeter run and you are left with 28 inches of actual walking space. A freestanding island in that room is not a design option — it is a code violation waiting to happen.
For two cooks working simultaneously, the minimum rises to 48 inches. That six-inch gap is the difference between two adults opening adjacent drawers without colliding and two adults apologising to each other every thirty seconds. If your household cooks together regularly, plan for 48 inches as a floor, not a ceiling.
The L-Shape Has Two Aisles, Not One
An L-shaped kitchen creates two distinct work aisles: one running parallel to the long leg of the L, and one running parallel to the short leg. Both must meet the 42-inch standard independently. The island that clears 48 inches from the cooktop wall but only 36 inches from the refrigerator wall has still failed — and the refrigerator side is the one that kills kitchens, because the French door fridge in this render swings out roughly 18 to 20 inches per door panel before you can even access the shelves.
A simple rule of thumb: an L-shaped kitchen needs at least 120 inches (10 feet) of clear floor space along each leg before a fixed island belongs in the plan. Measure from the inside corner of the L outward; do not count the cabinet depth twice. With 10 feet per leg and 24-inch-deep base cabinets on each wall, you end up with 72 inches of open floor on the long side — enough to centre a 30-inch-deep island and still clear 42 inches on both flanks.
Sizing the Island Itself
The minimum useful island is 24 inches deep by 36 inches wide. At those dimensions it holds a cutting board and a mixing bowl, period. No sink, no cooktop, no seating overhang — just prep surface.
A genuinely useful island starts at 36 inches deep by 60 inches long. That depth, combined with a standard 36-inch counter height, gives two people room to prep on opposite sides without stepping on each other. The island in this render reads as roughly 36 by 48 inches — large enough for serious prep work, small enough to keep both aisles open.
Island base cabinets come in the same door and drawer configurations as perimeter bases: door-only, drawer-over-door, and full-drawer stacks. Because the island is accessible from all four sides, the designer places cabinets back to back — two 12-inch-deep cabinets share a 24-inch-deep carcass, each opening to its own aisle. A 36-inch-deep island is built from two 18-inch-deep back-to-back runs. That back-to-back construction means every island cabinet loses about 1.5 inches to the shared back panel; factor that into your storage estimate.
Three Places It Goes Wrong
The oven door. A standard wall oven door is 18 to 22 inches deep when fully open. If the island is 42 inches from the oven tower, you have exactly 20 to 24 inches of remaining aisle to squeeze past an open oven — workable, but not comfortable with a hot rack in hand. A clearance of 54 inches between island and oven tower gives 32 to 36 inches of working room with the door open: that is the actual target, even though 42 inches technically satisfies the standard.
The corner pinch. In an L-shape, the inner corner of the perimeter is a dead zone — two cabinet runs meet at 90 degrees and one usually houses a lazy Susan or a blind-corner pull-out. If the island sits too close to that corner, you create a pocket where you can work but cannot exit without backing out. Leave at least 48 inches between the nearest island corner and the inner perimeter corner.
The seating overhang that eats your aisle. Adding a 15-inch knee overhang to the dining side of the island sounds minor until you realise it shifts the effective island edge 15 inches closer to whatever is on that side. If you designed 42 inches of clearance to the perimeter wall and then added seating, your aisle just became 27 inches — below the absolute minimum anyone should accept.
Adding Seating Without Breaking the Kitchen
Seating works on the side of the island facing the dining room or living area — never on the side facing the cooktop or the oven tower. The NKBA requires a minimum 12-inch knee overhang for seated guests; 15 to 18 inches is more comfortable for adults. At standard counter height (36 inches), that means counter stools with a seat height of 24 to 26 inches. For a bar-height island at 42 inches, bar stools with a 28-to-30-inch seat height are correct.
For the walkway behind the stools, Apartment Therapy cites 44 to 60 inches of clearance measured from the island edge — not from the stool back, which extends another 18 to 20 inches into the aisle. In practical terms: if your dining room is tight, an island with seating may leave the dining side of the room feeling more like a corridor than a gathering place. In that case a prep-only island with no overhang — like the one in this render — keeps both rooms breathing.
How to Check the Plan in the Flip Designer
Start by laying out the full L-shaped perimeter without the island: place all base and upper cabinets, the appliance tower, and the refrigerator. Lock those positions. Then add the island from the island category and position it in the centre of the open floor.
Check all four sides: the cooktop-wall aisle, the refrigerator-wall aisle, the outer-room edge, and the inner-corner distance. If either of the two work aisles reads below 42 inches, reduce the island depth by 3 or 6 inches — a 30-inch-deep island is still useful and keeps both aisles clear.
If you are adding seating, check the dining-side aisle last, after you have mentally subtracted the stool depth. An aisle that shows 54 inches in the designer becomes 36 inches in practice once three stools are pulled out — still passable for one person, cramped for two.
The number changes meaningfully between a 30-inch and a 36-inch island depth because that extra 6 inches adds a full row of back-to-back drawers.