Insert Hood vs. Chimney Hood: How Each Reshapes Your Cabinet Plan
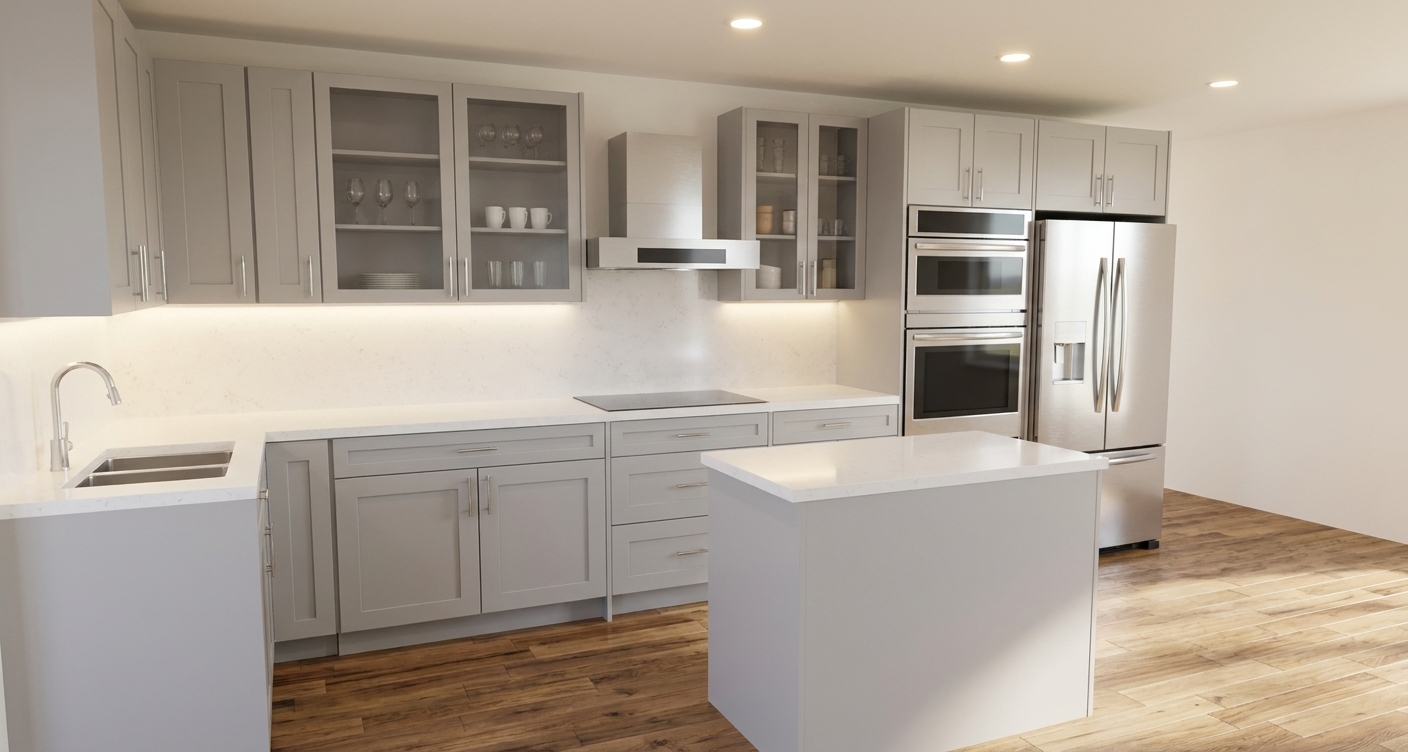
HGTV reports that the choice between a concealed insert hood and a chimney-style wall hood is one of the most consequential decisions in kitchen ventilation planning — because each type reshapes the entire upper cabinet run above your cooktop. This kitchen shows the insert approach at its best: light gray shaker uppers run continuously from wall to wall without any gap, glass-front display cabinets flank the concealed hood, under-cabinet LED strips illuminate the induction surface below, and a white quartz countertop and backsplash read as one uninterrupted surface. The chimney hood delivers drama; the insert delivers continuity.
What Each Type Actually Is
A chimney range hood mounts independently to the wall above your cooktop. It has its own decorative body — stainless steel, custom wood, or plaster — and a visible chimney section that routes ductwork up to the ceiling or soffit. It is a freestanding appliance; your cabinets build around it, leaving a gap in the upper run.
An insert hood (also called a liner or blower insert) is the opposite: just the motor, grease filters, and lighting, mounted inside a standard wall cabinet. The cabinet itself becomes the hood body. From the outside it looks like any other upper cabinet — which is exactly what this kitchen shows. The 30-inch wide wall cabinet directly above the induction cooktop contains the blower unit. The cabinets on either side carry glass-front shaker doors and continue the full upper run without interruption.
The Clearance Numbers That Drive Every Other Decision
Both hood types have minimum clearances from the cooktop surface to the bottom of the hood body (or cabinet), and these clearances set the height of every upper cabinet in the kitchen — not just the one above the cooktop.
For an insert hood over an electric or induction cooktop: 24 inches minimum from the cooktop surface to the bottom of the enclosing cabinet. Over any gas cooktop: 30 inches minimum, and this is the number most codes enforce regardless of fuel type.
For a chimney wall hood: 28 to 36 inches from the cooktop surface to the bottom of the hood canopy. High-output gas ranges above 50,000 BTU total benefit from the full 36-inch clearance to capture rising heat effectively.
Standard upper cabinet placement sets the bottom rail at 54 inches from the finished floor — 18 inches of clearance above a 36-inch countertop. An insert hood over induction at 24-inch clearance (36 + 24 = 60 inches) means the bottom of that enclosing cabinet sits at 60 inches, 6 inches higher than a standard upper. If you raise one cabinet, you raise them all — the hood clearance spec sets the upper cabinet rail for the entire kitchen.
How the Cabinet Plan Changes Above the Cooktop
With a chimney hood, you surrender the continuous upper cabinet run. The chimney body occupies the wall space between where uppers would be, and you need 3-inch filler strips on each side where the chimney edge meets the adjacent upper cabinet. If the chimney is narrower than the cooktop base below, those fillers get wider and need to be custom-scribed to the wall. Above the hood body, you can install a shallow display cabinet or bridge cabinet if ceiling height permits — typically only viable at 9 feet or more.
With an insert hood, the cabinet plan barely changes. Place a standard W30 (or W36) wall cabinet directly above the cooktop. The blower insert installs inside, using 8 to 10 inches of interior cabinet height for the motor housing; grease filters sit at the bottom face, just behind where a door would be. Most insert hoods ship with a door frame that matches the cabinet face or is left open for airflow. That enclosing cabinet loses all usable storage — it becomes a mechanical cavity. Every other cabinet in the run is unaffected.
The Tradeoffs You Do Not Read in the Brochure
Three real limitations of the insert approach:
CFM capacity. Insert hoods typically move 200 to 600 CFM. That is sufficient for induction and most electric cooktops, which generate minimal combustion byproduct. A four-burner gas range at full output needs 600 to 900 CFM; a professional-style 48-inch gas range may need 1,200 CFM or more. Undersize the blower and grease migrates into the adjacent upper cabinets over months of cooking.
Duct path. The blower needs a duct route to the exterior. A chimney hood routes the duct up through its visible chimney body — the path is open and obvious. An insert hood must push the duct through the cabinet back and then through the wall or ceiling in a concealed chase. On an exterior wall this is straightforward; on an interior wall it requires a duct run through the floor above or ceiling, which is a framing and mechanical problem, not a cabinet problem.
Storage loss. You sacrifice one full wall cabinet of usable storage — roughly 2.5 cubic feet on a 30-inch wide unit. In a kitchen with generous upper storage on multiple walls, this is irrelevant. In a compact galley where every cabinet counts, it can push you toward a chimney hood despite the visual tradeoff.
Who Should Skip the Chimney Hood
A chimney hood is the harder fit in three specific situations.
Ceilings under 9 feet. The chimney section must fill the gap between the hood canopy and the ceiling; at 8 feet with a standard 36-inch canopy height, that gap is only 18 to 24 inches, which looks proportionally stubby on most chimney styles and leaves little room to hide the duct.
Cooktops close to a corner or adjacent appliance tower. The chimney needs 3 inches of clear wall on each side plus filler strips to meet adjacent cabinets cleanly. If the cooktop sits within 15 inches of a corner or a tall cabinet, the chimney sides create a filler geometry that rarely looks right without custom millwork.
Induction cooktops paired with a continuous-cabinet aesthetic. Induction generates no combustion gases and far less grease vapor than gas. A properly sized insert hood at 300 to 400 CFM is entirely adequate, and there is no design reason to interrupt a clean upper cabinet run with a decorative chimney. This kitchen is a clear example: the induction surface, the wall-to-wall upper run, and the insert approach are the right combination.
Planning Both Options in Flip's Designer
Start in Flip's kitchen designer by placing the cooktop base cabinet. For an induction surface, a 30-inch or 36-inch four-drawer base works directly below the cutout — no gas rough-in to route, so full drawer-base storage is available under the cooktop. For gas, use a cooktop base with a shelf for the gas line access.
For an insert hood layout: place a standard W30 or W36 wall cabinet directly above the cooktop base. Confirm the gap from your countertop surface (36 inches from finished floor) to the bottom of the upper cabinet. If the upper rail is set at 54 inches, the gap is 18 inches — this meets most insert hood minimum clearances for induction. Mix glass-front uppers on either side of the hood cabinet as in this kitchen: use Flip's glass-door option on W24 or W30 upper cabinets flanking the hood position, and keep all the uppers at the same bottom-rail height for a continuous horizontal line.
For a chimney hood layout: leave a 30-inch or 36-inch gap in the upper cabinet run above the cooktop. Place 3-inch filler cabinets on each side at the gap edge where the chimney body will meet the adjacent uppers. Use Flip's chimney hood placeholder or a narrow upper on each side to represent the transition. The chimney hood itself is a separate appliance your contractor coordinates with the ductwork rough-in.
Use a tape measure to determine the range hood’s desired height, width and depth — be sure to account for the size of the exhaust fan, placement of vent to roof or exterior wall, and size of liner if one is being used.— Source: HGTV